Did you know that the whole world is experiencing hotter temperatures today than at any point since 1,000 years ago? That’s a huge range, but you’ll likely notice that it’s warmer now than when you were younger.
It’s easy to control the temperatures inside, thanks to AC and radiators. You don’t have as many options outdoors.
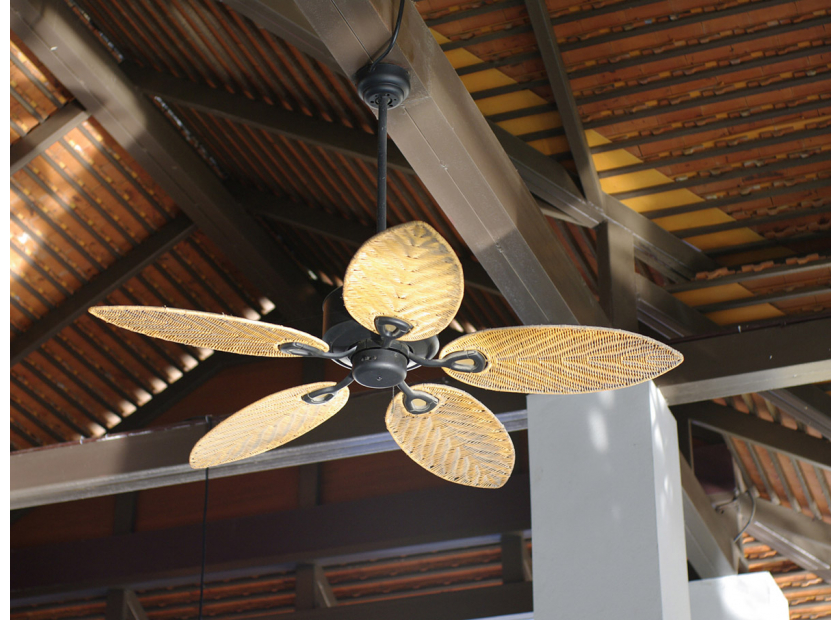
If heat is stopping you from hanging out in your backyard, then you need an outdoor ceiling fan. Install it in your pergola; we’ll teach you how below.
1. Choose a Wet-Rated Fan
First, you must choose the right ceiling fan to install in your pergola. As your ceiling fan will be outside, it will have exposure to rain and all types of weather.
Choose a wet-rated ceiling fan. It has a design and all-weather blades to help endure rain, snow, and ice. As such, you can also clean them with a hose and it won’t bother them.
Don’t mistake wet-rated outdoor fans for pergolas with damp-rated ones, though. These are for outdoor areas, too, but they should not have direct exposure to rain or other types of water. They can handle moisture in damp areas, but damp ranted models are not designed for direct rainfall.
The rating isn’t the only thing to consider when choosing a pergola fan, though. If you want a fan equipped with a light, make sure that it’s okay for outdoor use, as well.
For areas with a high ceiling, you may want to use a downrod to extend your fan closer to the living level. On a low ceiling, you may want a flush mount model.
The blades of the fan may come in different sizes, as well. The right fan size depends on the size of the area you wish to cool. Remember that the blade sizes start from the tip of one blade and end with the tip of the opposite blade.
2. Use a Board to Cover the Fan Base
Even though you buy a wet-rated fan, however, there’s a proper way to install it. A mistake many people make is to leave the canopy of the fan exposed.
In most cases, homeowners use a board with a junction box built inside. This allows the fan to mount flush to the bottom, so that water won’t get into the wiring inside.
An alternative is to mount the junction box to a board, after which you attach the fan to the box. This would work in some cases, although it leaves a gap between the fan canopy and the box.
This wouldn’t work, however, with flush mount fans. With such fans the motor housing doubles as the ceiling canopy; because this creates a much larger opening you will want to be sure you cut a board just larger than the base of the flush mounted fan to prevent water from coming in from above.
Improper installations can have severe consequences. At best, the water will get into the motor and ruin your pergola ceiling fan. At worst, it can cause a short circuit and the subsequent fire.
3. Attach the Wires
You then need to locate the center of your pergola. You need precise measurements so you can transfer them to the PVC conduit.
The wires will go inside the PVC and into the board and junction box. You can tighten the wires to the framing of the awning using wire ties. To attach the pipe to the junction box, use glue.
You can also run the wires through the hollows of your structure. This will keep the wires out of sight, minimizing the impact on the overall aesthetics of your pergola. It’s also the best option for protecting your wires.
Some pergolas may already have the wiring from a light fixture. If this is the case, then you can use the existing wiring and connect it to your fan. Remove the lighting to expose the wire.
If you don’t have much experience dealing with electrical wires, it’s better to leave it to an electrician.
4. Place the Board Between the Pergola Slats
To maintain the aesthetics of your pergola, place the board between the slats. This is also optimum for structure and stability. Try to find a board with the same color as your structure to keep it subtle.
The dimensions of the board don’t matter too much, so you can fit it into whatever space. It must only be wide enough to cover the junction box and the base of the fan in their entirety.
Drill through the frame and the box. Use lock washers and nuts to slide the bolts through the holes. You can also use mounts to attach the board to the awning.
5. Install the Support Brace
Once you have the wiring and the junction box sorted out, you need to mount the fan installation bracket. Install it to the box attached to the frame.
If replacing an existing fan it is important to remove the mounting bracket of the fan being replaced, and replace it with the one supplied with your fan. The previous brace might not be strong enough to support new fan, and also the screws may not line up correctly with the new fan's canopy. Use lock washers and strong bolts to make it sturdy enough so it doesn’t become loose.
6. Set Up the Pergola Ceiling Fan
It’s time to install the fan.
You will need to connect the wires in the electrical box to the fan. Strip the wires and trim them back, then it’s a case of matching them into the appropriate colors. Once you’re done with the wires, finish the installation of the whole fan into the board.
With most ceiling fans it is suggested to install the blades after the base of the fan is up and all wiring connections are made. Some feel it is easier to install the blades before handing the base of the fan and connecting the wiring, but if you do this you will risk bending a blade holder out of alignment. If this happens you may end up with a wobbly ceiling fan. Therefore, if at all possible install the blades after the motor in already handing and wired at the ceiling.
Switch the fan on to see if it works. If it does, then you can now enjoy the cool breeze it brings. As a bonus, it also protects you against mosquitoes in two ways: by keeping you free of sweat and by keeping them away with the wind.
Find the Perfect Ceiling Fan for Your Pergola
It should only take about an hour to install a pergola ceiling fan. If your structure does not already have wires ready for use, then it may take a little longer. If you are unsure about the wiring, or uncomfortable installing an electrical appliance, such as an outdoor ceiling fan, don’t forget to consult a licensed electrician before you go ahead with your project.
The first step in this project, though, is to find the perfect fan for your pergola. Check out our collection now or contact us for any questions.
| BEST CEILING FAN NAME BRANDS AT THE PALM FAN STORE | ||||
| TROPOSAIR | GULF COAST | FANIMATION | MINKA AIRE | MODERN FORMS |
| CRAFTMADE | CASABLACNA | HUNTER | VAXCEL | ALL BRANDS |
